Beginner Gardening Series: September Edition
September is the month where you can look at your garden and take stock of what worked and what didn’t, harvest the remaining produce growing in the garden (except for a few frost loving plants, will talk about that later) and put your garden to bed for the winter. If you live in some of the warmer climates, you can now restart your garden! For the plants that like the heat (like tomatoes and peppers), start the seeds indoors or buy starter plants. I, however, live in zone 5-6, so no replanting of the garden here. I will be taking the steps to put my garden to bed and do what I can to get it ready for next Spring.
T A K E N O T E
Get yourself a cute little notebook (don’t we all buy one everytime we go into Target?!) and take note of your garden. What grew well in the garden this season? Did your tomatoes get enough sun? Did your squash plant succumb to mildew? These are observations that will help you in planning your garden for next year! Your placement of plants may change based on your observations. For me, I need to move where I planted my squash because it was affected by mildew. So…I need to find a place that gets more sunshine to prevent this from happening again.
 W H E N T O H A R V E S T
Are you daily looking at your peppers wondering if they are ever going to turn red?? While it is ideal to let peppers, like tomatoes, ripen on the vine, there does come a time when all the peppers and tomatoes need to be harvested from the garden and left to ripen indoors, out of direct sunlight. So yep, harvest your tomatoes and peppers, even if they aren’t perfectly ripe and let chemistry do it’s thing indoors. Now with this said, if you have planted some “cool crops” you can leave them in the garden until after the first frost. Some cool crops are Kale, Broccoli, Cauliflower, Brussel Spouts, Spinach, Collard, Asparagus. A quick Google search of “cool crops” will provide a great resource if you are wondering if any crops you have planted are considered a “cool crop”.
TIP: you can leave carrots in the ground through the Winter (they may actually get sweeter as the carrot holds on to it’s sugar to combat the cold), however, you will need to harvest them before Spring as they will go to seed and not be edible.
P U T T I N G the G A R D E N to B E D
One thing I always need when going to bed is a blanket, your garden likes one too! There are a couple of ways you can create a “blanket” for your garden. You can grow a cover crop. Stay with me here, this sounds much more complicated than it really is. A cover crop is as simple as tossing some seeds on your cleaned out garden bed. This helps create a barrier between the Winter elements and your garden soil. Cover crops also give back vital nutrients that were taken from the soil to produce all your yummy veggies! A seed that I recommend is Cereal Rye. Sprinkle the seed ideally 4 weeks before the first hard frost, or as soon as you can after cleaning your beds. Literally let nature do the work and watch it grow. If planting another crop has you rubbing your temples, then a nice layer of straw or some other type of mulch will also provide a sufficient barrier for your garden soil against the harsh winter elements.


The Garden Goods: Companion and Succession Planting
Hi Garden Friends and welcome back to the Garden Goods, where we give you garden tips and build your growing confidence!
Have you heard of the terms companion planting and succession planting? Big words, but simple concepts. Let’s break them down.
")
Companion planting – the planting of certain plants together for a mutual benefit, usually pest control and soil improvement. You can also think of it as maximizing your growing space. If you’ve heard of 3 sisters planting, the Indigenous People’s method of planting corn, beans, and squash together, that is companion planting. The corn provides a trellis for the beans to grow up and the squash trails along the ground smothering the weeds. It’s letting the plants work together in harmony while also protecting and building your soil.
There are many books and theories about which plants “should & shouldn’t” go with other plants. We all garden in different spaces and regions and there is not one perfect answer, except diversity! Mixing in flowers and herbs among your vegetables will help to confuse and repel the insects you don’t want and draw in the pollinators you do. Nature works better together, just like with the 3 sisters method think about which plants could work well together. Pole beans can provide shade to lettuces, while nasturtiums and alyssum can be a great mulch around tomatoes and peppers.
Some of the best plants to mix in are:
Basil – a great companion to tomatoes and peppers, harvest often as the flavor is bitter once it flowers. However, allowing some to flower is a huge magnet for bees and pollinators. Try some new varieties like dwarf Greek, purple, or Thai basil.
Alyssum – a low growing ground cover with shallow roots that won’t compete with other plants. It has beautiful little flowers that pollinators love too.
Marigolds – a classic garden companion plant that comes in so many varieties, a must have in my garden that I love to tuck into all the garden beds. While you may hear that the scent of marigolds keeps bugs away it actually attracts good insects for the garden, like hoverflies and lady bugs that will help get rid of the bugs you don’t want like aphids. Marigolds do release a chemical into the soil that can be detrimental to hatching nematode eggs, nematodes live in the soil and can damage plants by sucking nutrients from roots.
Beans – beans are legumes and nitrogen fixers, meaning they add nitrogen back into the soil after they have died back. For maximum benefit leave the plants until they have died back and then cut ant the base of the plant, leaving the roots and nitrogen in the soil. They are also drought tolerant; I love tucking a few bush beans into an empty garden spot.
Pro Tip:
Keep in mind some plants make better buddies than others. It’s best to place plants together that have similar water and nutrition needs so they aren’t competing for resources.
Succession Planting/Sowing – Planting crops at different times to maximize your harvest and season. What you choose to succession plant will be based on the length of your season and what you like. Before succession planting, ask yourself if you would like to harvest a bunch of this vegetable at one time or have the harvest spread out through my season? For example, you may want to plant a small amount of carrots every few weeks. That way you are able to harvest longer. That would be succession planting. Or you may want to can your green beans and want them all to mature around the same time so you would only plant once.
Like most things in the garden, there is no one answer. Play around and find what works for you and your climate. The ground loves to be covered. Why not plant something else when you take something out? This is also a great time for crop family rotation to replenish the soil. Rotating crop families around the garden can help build back your soil and prevent diseases and pests. For example, if you had heavy feeders like onions or brassicas in a spot, plant beans or peas to add nitrogen back in.
“On the first day of spring, I dig my fingers deep into the soft earth. I can feel its energy, and my spirit’s soar.” Helen Hayes
The Garden Goods: Basics And Benefits Of Gardening
Thinking about gardening, but not sure where to start?
We’re gardeners ourselves and are here to help with our new monthly email series, The Garden Goods.
Each month we will dispel gardening myths while providing tips and tricks to get you started and
building your confidence so you will be growing and gathering before you know it.

This month let’s talk basics and benefits.
The benefits to gardening are tremendous!
Reduced stress levels, increased happiness, self-esteem, and brain boosting are just a few of the many
benefits that gardening can provide you. Did you know there is a healthy bacterium, Mycobacterium
vaccae, that lives in the soil and when exposed to it, it can increase levels of serotonin and reduce
anxiety. Plus who isn’t looking for increased physical activity, better heart health and an improved diet?
A garden can provide all these things and so much more. Even if you think you don’t like vegetables, I
promise when you grow it yourself, it tastes 100 times better than anything in the store.
Myth: I don’t have a green thumb and kill plants
False! Gardening is a skill that can be learned and fine tuned just like anything. We can a green thumb
through the act of gardening, getting in the dirt and learning as we grow!
Myth: I don’t have the space to garden
You don’t need acres of land, a huge yard or even a yard to garden!
There are many ways to garden:
In ground – growing plants directly in the ground. This can be on as large or small as scale you have.
No till – layering compost, organic material on top of the ground. Great option if you don’t want to use
heavy equipment to break up the soil, there is also added benefits to this method (more on this later)
Raised beds – can be made from materials you have or purchased, creates an instant garden, great
option if your native soil isn’t great also if you want to make gardening more accessible.
Container gardening – if it can hold soil, it can be a garden. Containers are great for patios, driveways,
anyplace that you can place a container.
Felt grow bags – these also can be placed just about anywhere and the added benefits to these are you
don’t need to crate drain holes the excess water naturally drains out.
Hydroponic gardening – this is growing plants in a sterile medium such as sponges or clay stones in a
water base. No soil involved. there are many great systems available now from small units that sit on a
counter to larger ones that stand upright and hold many plants.
Now, that we know anyone can be a gardener ask yourself, what does my space look like? How much
time do I want to commit to this? Even if you have two acres to use, do you necessarily want to have
that big of a garden.
My tip would be top start small, gain the confidence and get bigger as you go. Trust me, you will end up
going bigger, us gardeners can’t help it.
Hot Tip:
Remember the most important part to remember, is to just start. The very best way to learn is through
doing, we believe in you!
Stay tuned for next month where we will discuss, setting your garden space up for success, choosing the
right plants and timing.
“The glory of gardening: hands in the dirt, head in the sun, heart with nature. To nurture a garden is to
feed not just the body, but the soul” – Alfred Austin
Please pass along to a friend that may be thinking about gardening too, gardening is even better with a
buddy!
")
Gift Guide For The Gardener – Under $50
Finding the perfect gifts for the gardeners on your list can be a challenge. Whether they’re a seasoned green thumb or just beginning, this gift guide is full of thoughtful and practical items, all priced under $50. From innovative tools to charming accessories, you can embrace the joy of gifting without breaking the bank, and watch as your loved ones’ gardens flourish with the thoughtful additions from this budget-friendly guide.

Inspire others to live the garden life with our Garden Life Hat.
Available from Roo Gardening
-
6-panel cap
-
Plastic Adjustable Snap
-
Size: OSFM – Adult (58cm/22.8″)
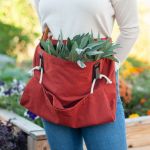
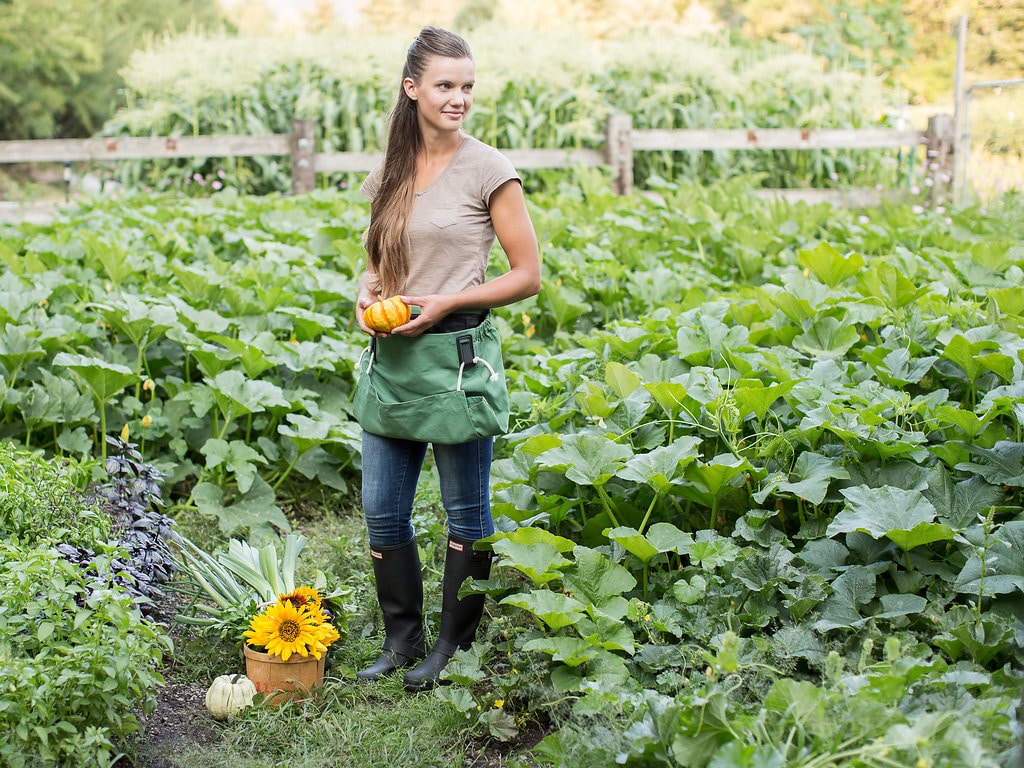
The Joey Apron still has the benefit of our emptying pouch, but with the option of ease by buckling the apron around your waist. Ideal for the Urban gardener, gardeners living in warm climates or with smaller gardening/harvesting needs.
-
3 additional deep storage pockets
-
Water resistant lining
-
Machine washable
-
Extends to 56” around the waist
-
Available in 5 colors
Because you will want to remember your gardening triumphs (and occasional setbacks), A Gardener’s Journal is set up as a 10-year perpetual diary, which you may begin at any time.
In the diary section, one page is given to each day of the year, and each page is divided into 10 sections – more than enough for 10 years of personal jottings. In addition to the diary pages, there is also a section on such gardening techniques as composting, digging garden beds, tree care, soils, and garden tool maintenance, to name but a few. We also provide reference material and numerous charts.
Available from Lee Valley
CANDLE & PLANTER: Enjoy the candle, then use the beautiful terra-cotta container as a plant pot for succulents or small flowers.
Available from Wayfair
Get to gardening with our Roo gardening apron bundle and save. Choose your color of gardening apron, and included is a matching kneeling pad and rust-free aluminum trowel. O/S fits all, machine washable.
Available from Roo Gardening
In Plantopedia, Lauren Camilleri and Sophia Kaplan from Leaf Supply present the definitive guide to keeping happy, healthy houseplants in any space. Featuring:
-
More than 130 plant profiles including foliage plants, succulents and cacti, as well as rarer gems of the plant world.
-
Detailed care information including troubleshooting tips and tricks to ensure that your houseplants thrive.
-
Plants for all levels of indoor gardeners, from budding novices to green thumbs and beyond.
Available from Amazon
Your garden: It would be paradise if stinging critters, itch-causing leaves, and harsh UV rays didn’t diminish the bliss. These nifty sleeves protect your arms from all of the above without so much as a drop of greasy, sticky sunscreen or insect repellant. Their elastic top and bound thumbholes keep them in place even during vigorous weeding and planting sessions, or biking or running sessions, while the sweat-wicking, UPF 50+ poly-spandex fabric cools your skin. Choose funky sunflower or elegant green sleeves in S/M, L/XL, and XXL.
Available from Uncommon Goods
Whether it’s filled with tea, coffee or water, your Plant Lady will love this mug, made especially for her!
Available from Roo Gardening
Get to gardening with our Joey gardening apron bundle and save. Choose your color of gardening apron, and included is a matching kneeling pad and rust-free aluminum trowel.
O/S fits all, machine washable.
Available from Roo Gardening
A Guide To Fall Container Gardening
")
As summer says goodbye and the air turns crisper, it’s time to transition your garden from vibrant blooms to the rich and cozy hues of fall. But just because the temperatures are dropping doesn’t mean your gardening journey has to come to an end. Fall container gardening offers a wonderful opportunity to showcase the season’s stunning colors, textures, and foliage right at your doorstep or on your balcony. Join us as we dive into the art of fall container gardening, exploring plant choices, design tips, and maintenance practices that will help you create a breathtaking autumn display.
Choosing the Right Plants:
- Mums – The Autumn Stars: Chrysanthemums, or mums, are the quintessential fall flowers. With a range of colors from warm yellows and oranges to deep purples and reds, they provide a burst of color that perfectly complements the season.
- Ornamental Grasses – Textural Delights: Grasses like fountain grass and Japanese forest grass introduce captivating textures to your containers. Their graceful plumes and foliage sway in the autumn breeze, adding movement and depth.
- Kale and Cabbage – Edible Elegance: Edible plants can be aesthetically pleasing too! Ornamental kale and cabbage showcase exquisite frilly leaves that shift from green to purple or white, creating a striking focal point.
- Pansies and Violas – Charming Cool-Weather Blooms: These cold-tolerant blooms provide a pop of color even as the temperature drops. Their delicate petals and range of colors make them a versatile addition to any fall container.
- Heucheras – The Marvelous Foliage: Known for their stunning foliage in shades of burgundy, orange, and gold, heucheras add depth and drama to your container arrangements. Their leaves intensify in color as the weather cools.

Designing Your Containers:
- Thriller, Filler, Spiller: Follow the classic “thriller, filler, spiller” design concept. Choose a tall and striking plant as the thriller (e.g., ornamental grass), fill in with medium-height plants (mums or kale), and let trailing plants (trailing vines or ivy) spill over the edges.
- Color Palette Harmony: Opt for a harmonious color palette that reflects the fall season. Consider warm shades of red, orange, yellow, and deep purples. A monochromatic scheme can create a sophisticated and cohesive look.
- Varied Textures: Mix and match plants with different textures to add visual interest. Combine the delicate petals of pansies with the bold leaves of kale and the feathery plumes of grasses for a multi-dimensional arrangement.
- Container Choice: Select containers that complement your chosen plants and your outdoor space. Rustic wooden crates, metallic pots, or traditional clay pots can all contribute to the overall aesthetic.

Maintenance Practices:
- Watering: While fall usually brings more rain, be attentive to your container’s moisture needs. Containers tend to dry out faster due to reduced humidity and cooler temperatures. Water thoroughly when the top inch of soil is dry.
- Deadheading: Regularly remove spent blooms from flowers like mums and pansies to encourage new growth and extend the flowering period.
- Fertilization: Apply a slow-release, balanced fertilizer to ensure your plants receive the nutrients they need throughout the fall season.
- Protection from Frost: As frost becomes a concern, consider moving your containers to a sheltered area or covering them with frost cloth during cold nights.
- Pruning: Trim back any leggy growth or damaged foliage to maintain the overall shape and appearance of your container garden.
Fall container gardening is an exciting way to celebrate the changing season and bring all the fall colors to your doorstep. By carefully selecting plants, having fun with designs, and practicing proper maintenance, you can create stunning container arrangements that capture the essence of fall. So, don’t let the cooling weather deter your green thumb – instead, grab your pumpkin spice latte and enjoy creating a spectacular fall pot that welcomes both you and your visitors with its warm and inviting charm
Tips and Tricks for Growing a Bountiful Fall Garden: Your Ultimate Guide

As the warmth of summer starts to wane and the leaves begin to change, we are presented with a unique opportunity to extend the gardening season by growing fall garden vegetables. Fall gardening not only allows you to make the most of your outdoor space but also provides a harvest of fresh, flavorful vegetables well into the cooler months. Join us as we explore a variety of tips and tricks to help yield a bountiful harvest.
Selecting the Right Vegetables
Choosing the right vegetables for your fall garden is super important. Opt for cold-hardy and quick-maturing crops that can withstand chilly temperatures and shorter daylight hours. Some great choices are carrots, spinach, lettuce, kale, radishes, broccoli, Brussels sprouts, and cauliflower.
Timing is Key
Timing plays such an important role in the success of your fall garden. Begin by calculating your area’s average first frost date, as this will guide your planting schedule. Count backward from this date to determine when to sow your seeds or transplant seedlings. Keep in mind that fall gardens often require earlier planting than spring gardens, as the vegetables need sufficient time to mature before the cold weather sets in.
Soil Preparation
Healthy soil is essential for a successful fall garden. Begin by removing any remnants of summer crops and weeds. Incorporate compost or well-rotted manure to improve soil structure and fertility. A well-draining soil is crucial to prevent waterlogged roots during fall rainfall.
Mulching Matters
Mulching serves several purposes in a fall garden. It helps to regulate soil temperature, conserve moisture, suppress weeds, and provide a protective layer for root systems. Organic mulches like straw, leaves, or wood chips keep the soil insulated and are a great additional to your fall garden.

Watering Wisely
Just as important as watering is to your summer garden, it is for your fall garden. As temperatures drop and rainfall becomes less predictable, it’s important to monitor soil moisture. Water deeply and less frequently to encourage plants to develop strong root systems. A drip irrigation system can help deliver water directly to the root zone, minimizing water waste and reducing the risk of fungal diseases.
Protecting from Frost
Unlike summer gardening, one of the greatest challenges of fall gardening is the threat of frost. Be prepared to protect your crops by having frost blankets or row covers on hand. When frost is forecasted, cover vulnerable plants in the evening before temperatures drop. Remember to remove the covers during the day to allow sunlight and air circulation.
.
Fertilization Strategies
The diet doesn’t stop with your fall garden. Applying the right nutrients at the right time is essential for healthy plant growth. Before planting, work a balanced fertilizer into the soil. Avoid over-fertilizing, as this can lead to excessive foliage growth at the expense of fruit development.
.
Fall gardening gives us an exciting opportunity to continue enjoying fresh, homegrown vegetables well beyond the summer months. By selecting the right vegetables, timing your plantings, preparing your soil, and practicing good gardening techniques, a bountiful fall harvest is waiting for you!
Happy gardneing!
.
Harvesting 101: Twist, Pull Or Cut Your Vegetables
")
Are you tired of second-guessing how to properly harvest your vegetables? Wondering whether to twist, pull, or cut them off the plant? From twisting off beans and peas to carefully cutting lettuce and gently pulling carrots from the ground, we’ll provide you with the knowledge and confidence to harvest your garden’s bounty like a pro. Get ready to discover the art of harvesting and take your vegetable-growing experience to a whole new level!
Twist:
Here is a list of the most commonly grown vegetables that we recommend you twist to harvest.
- Beans: Snap beans, such as green beans or yellow beans, can be harvested by gently bending the bean pod until it snaps off the plant. This technique allows you to harvest the beans while leaving the stem intact.
- Peas: Similar to beans, peas can be harvested by twisting or gently pulling the pea pod from the plant. Make sure the peas inside the pod have reached the desired size and maturity before harvesting.
- Zucchini and summer squash: Small to medium-sized zucchini and summer squash can often be twisted off the plant when they are ready for harvest. Hold the fruit near the base and give it a gentle twist to detach it from the stem.
- Eggplant: When eggplants are fully mature and have reached the desired size, they can be twisted or cut off the plant. Make sure to use a sharp knife or pruning shears if twisting doesn’t work easily.
- Okra: Okra pods are typically harvested when they are about 2 to 4 inches long. You can twist or snap them off the plant, being careful not to damage the plant.
Cut:
Cutting is a common harvesting technique used for various vegetables. Here are a few examples of vegetables that are typically cut for harvest:
- Lettuce and leafy greens: Harvest lettuce and leafy greens, such as spinach, kale, or Swiss chard, by using scissors or a sharp knife to cut the leaves off just above the base of the plant. This allows the plant to continue producing new growth for future harvests.
- Herbs: Herbs like basil, parsley, cilantro, and mint are usually harvested by cutting the stems just above a leaf node. This encourages bushier growth and allows you to gather the fresh leaves for culinary use.
- Broccoli and cauliflower: When broccoli or cauliflower heads reach the desired size and maturity, use a sharp knife to cut the central head along with a few inches of stem. This encourages side shoots to develop for continued harvests.
- Cabbage: Harvest cabbage by cutting the head off just above the lowest set of leaves using a sharp knife. Some varieties may produce smaller side heads that can be harvested later.
- Tomato: Locate the stem where the tomato attaches to the vine. Hold the tomato gently to avoid damaging it or the plant. Position the shears or knife just above the stem and make a clean, quick cut through the stem, leaving a small part of the stem attached to the fruit.
- Celery: Cut celery stalks at the base of the plant when they have reached the desired size and thickness. Remove outer stalks first while allowing the inner ones to continue growing.
- Fennel: Cut fennel bulbs at the base of the plant when they have reached the appropriate size. You can also harvest fennel fronds by cutting the feathery leaves near the top of the plant.
Remember to use clean, sharp tools to minimize damage to the plants and ensure a clean cut.
Pull:
Pulling is a common harvesting technique used for several root vegetables. Here are some of the most common vegetables that are typically pulled from the ground for harvest:
- Carrots: Carrots are usually harvested by gently pulling them out of the soil. Grasp the foliage near the carrot top and give a firm, steady pull to remove the carrot from the ground. If the soil is compacted, you can use a garden fork to loosen the soil around the carrots before pulling.
- Beets: Beets are also pulled from the ground for harvest. Similar to carrots, grasp the beet foliage near the top and gently pull to remove the beetroot from the soil. You can trim off the leaves afterward, leaving an inch or so of the stem intact for storing.
- Radishes: Radishes are quick-growing root vegetables that can be pulled when they have reached the desired size. Grasp the leafy top of the radish and gently pull it out of the soil. Harvesting radishes at the right size ensures a crisp and flavorful root.
- Turnips: Turnips are typically pulled from the ground when they have reached their mature size. Grasp the turnip foliage near the top and give it a gentle pull to remove the root from the soil. Larger turnips may require loosening the soil around them before pulling.
- Potatoes: While potatoes are technically tubers, they are also harvested by pulling the plants from the ground. Once the potato plants have died back and the skins are mature, gently dig around the plants using a fork or shovel to loosen the soil. Then, carefully pull the plant out of the ground, exposing the potatoes beneath.
If the soil is compacted or the vegetables are stubborn to pull, you can use a garden fork to loosen the soil gently before pulling.
By understanding the appropriate techniques for each type of vegetable, you can ensure optimal flavor, quality, and plant health. Whether it’s twisting off beans, pulling carrots from the ground, cutting tomatoes from the vine, or using various methods for different vegetables, each technique plays a crucial role in preserving the integrity of the plant and maximizing your harvest.
Remember to always consider the specific needs of each vegetable, such as ripeness indicators, appropriate tools, and gentle handling. Prioritize clean cuts, sharp blades, and careful handling to minimize damage and maximize the shelf life of your freshly harvested produce.
Now armed with the knowledge of twisting, pulling, cutting, and other techniques, go on and enjoy harvesting your own homegrown vegetables. Happy harvesting!